Insights
Top tips for creating a brand presence in the metaverse
7 minute read
10 February 2023
In our last blog in this series we discussed The metaverse of the future and explored how we’re going to get there and what it could look like. It’s still a way off though as it’s widely predicted that it will become an integral part of the internet’s evolution by 2030.
So where does that leave us all right now? Opinion seems to be divided. Some are diving straight in and creating their own brand presence and others are waiting on the sidelines to see how things pan out. I guess the big question still remains as to whether it is ‘value or vanity’ in its present form?
In true TheTin-style we’ve dived straight in and created, tested and gone live with our own metaverse presence as a prototype so we can share our learnings.
Ideation: The inspiration
Like many other businesses after lockdown we made the switch from having our own office to sharing a co-working space. Although it suited our new way of hybrid working we felt that we had lost some of our personality.
In our old office we had a wall of iconic “stuff”. It was a collection of memorabilia and objects that members of TheTin team had picked up over the years from holiday or just something they thought looked cool. Every object had a story to tell: where it came from, who it belonged to and the memories each item evoked or were associated with it. Our wall of “stuff” was a talking point for anybody who visited TheTin.
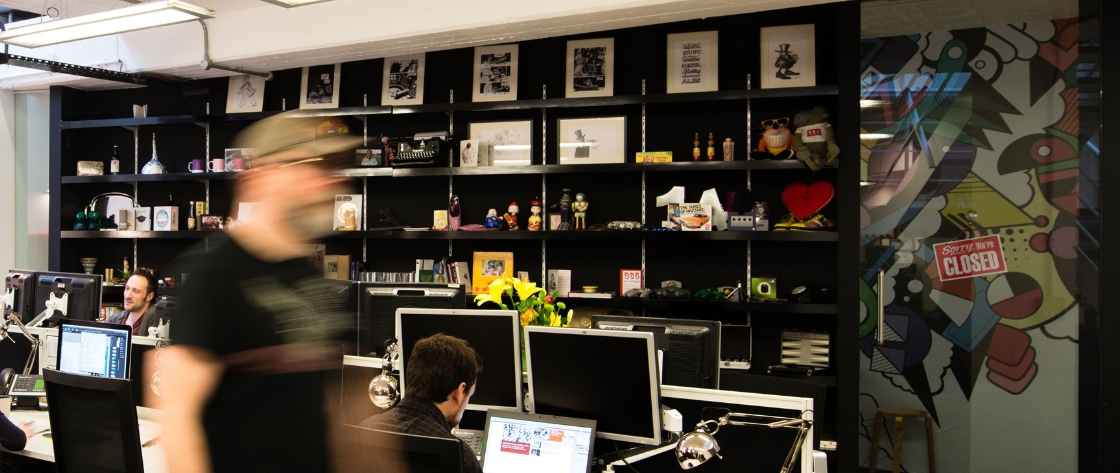
We felt that it would be amazing if we could recreate our wall in the metaverse so that we could bring back some of that company culture. Not only that, we thought that all new members of staff could add their objects and share their stories so our metaverse grew as we did.
So we set out to create TheTin’s metaverse Museum of Curious Objects!
Make a plan: setting conditions
- We wanted minimal barriers to entry i.e. we didn’t want users to need to download anything, sign up or require special equipment. However, enabling it to work in VR was key.
- We wanted to use our own assets. The objects are personal to us along with their stories, so we didn’t like the idea of having to make ‘Voxel cube’ versions of them in Sandbox or Minecraft.
- Also, we didn’t want to have to buy expensive land somewhere. As cool as it would be to have the space next to Snoop Dogg, it didn't feel like the best use of $450,000!
- And, when creating the space it had to make use of our in-house skillset.
We knew what we wanted to do but we had to figure out how we were going to make it.
The process: creating a world
Next, we needed to choose a platform. There were two key factors we had to consider:
- Creating the space itself
- Creating the objects that’ll populate it
Game engines like Unity or Unreal can create super-realistic 3D models. So, one option was that we could build a fully realised recreation of the old office space and the objects with coded interactions and animations. It sounded cool, but it would be a huge undertaking and wouldn’t be suitable as a prototype.
We could build our space using an in-world engine. A lot of the biggest metaverse platforms offer this option, but often require the objects to be built in their style meaning we couldn’t have the objects how we wanted them.
We also considered whether we could scan the real life space using the LiDAR in our phones to create a photo-mapped recreation of the space. But we’d already moved out of the building so this wasn’t an option.
The process: choosing a platform
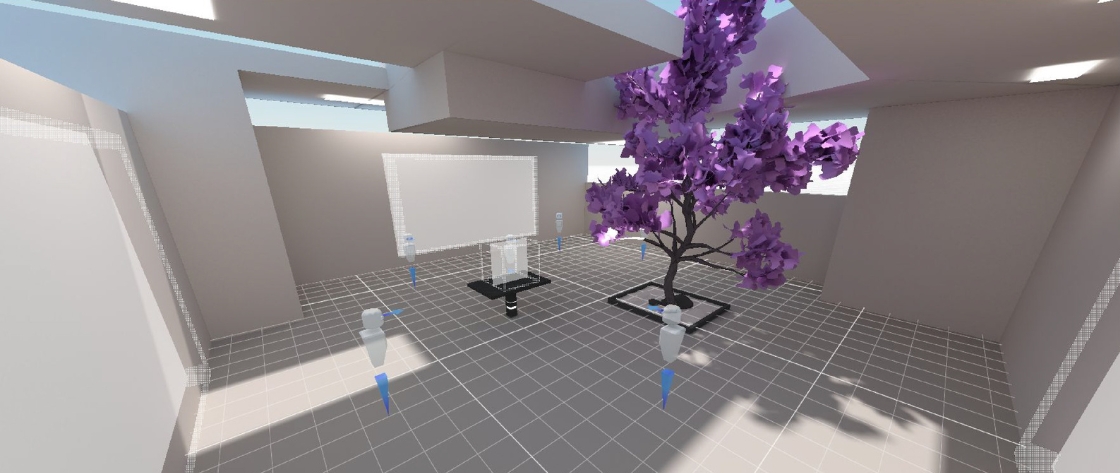
After some deliberation, we chose Mozilla Hubs as we felt it was a perfect fit. We could easily create 3D VR environments that would work on any device; be that phone, desktop or headset without any download or sign up.
All the built in features were perfect for us, it supports up to 30 people at once, and has features like integrated voice chat and the ability to share media. It even lets you play live YouTube streams directly in-world, and, best of all, it’s free.
The space itself could be built using an in-world engine called Spoke, which offered a quick and easy way to create the environment using simple drag and drop pieces.
It also allows for users to upload their own assets, so we could upload our objects directly into the world without any need to stick to the platform's design aesthetics.
The process: building the space
We found the tools fairly simple to use. It’s important to point out though that we aren’t talking about best practices when developing 3D worlds, there’s a lot that can be learned from architecture or even video game development about the different possibilities when designing an experience that doesn’t need to apply to the real world rules of physics, perhaps something we could explore in one of our TinnovationLive events!
The process: building the experience
The process of adding our objects also started relatively simply, we knew from our research that we were going to scan real objects using one of multiple apps.
These apps work by taking a series of photographs around the object which then uses smart photomapping tech to produce a photorealistic 3D model.
We decided to scan the objects using MetaScan, a LiDAR based app on IPhone. It produced the best quality objects without any need to remove the background, was easy to use and the Pro version wasn’t too expensive.
We also created a small photography setup using a lightbox to ensure the objects looked their best and also used an electric Lazy Susan so we could ensure 360-degree coverage.
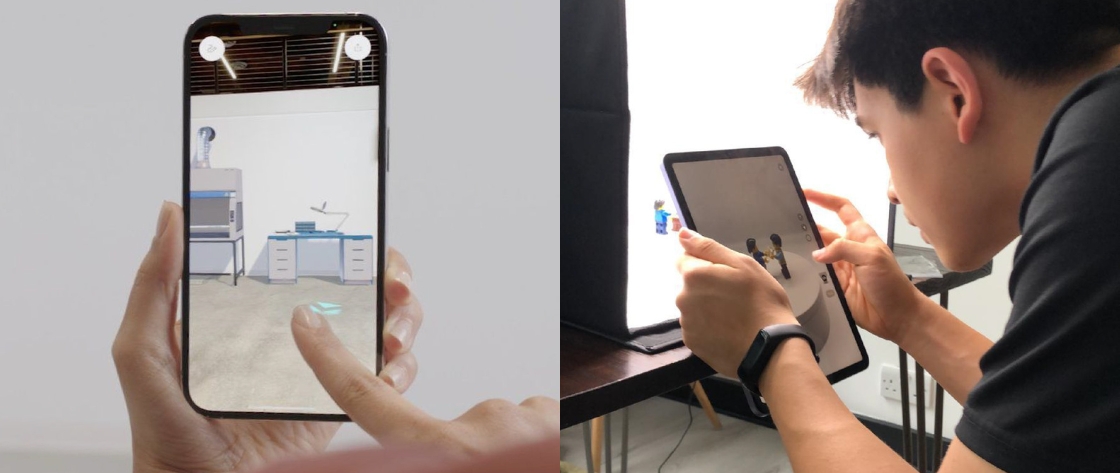
Despite it taking quite some time we were able to capture all the objects and upload the assets to Mozilla hubs. All was going well, until we first attempted to publish the scene and we were met with more red error messages than green ones!
Turns out uploading raw high res models made up of hundreds of pictures causes some slowdown, especially on phones. Mozilla also had an upper limit on the size of file that they’d let us host.
So, we began trying to figure out how to optimise the objects.
I won’t go through the full painstaking process of how we did it but we ended up running the objects through Blender; a 3D editing tool to simplify the objects and reduce the polygons (the triangles that make up the overall shape) and then scale the textures in Photoshop, package them all together again and upload them to Mozilla hubs.
This process solved our issue by reducing the files by nearly 10X with minimal loss in quality when our objects are viewed on the shelves (in our main room).
The launch: The Tin’s Metaverse Museum of Curious Objects
So we did it! We created our very own metaverse space where users can interact with each other: “TheTin’s Metaverse Museum of Curious Objects” was launched!
Explore our metaverse here and take a look around.
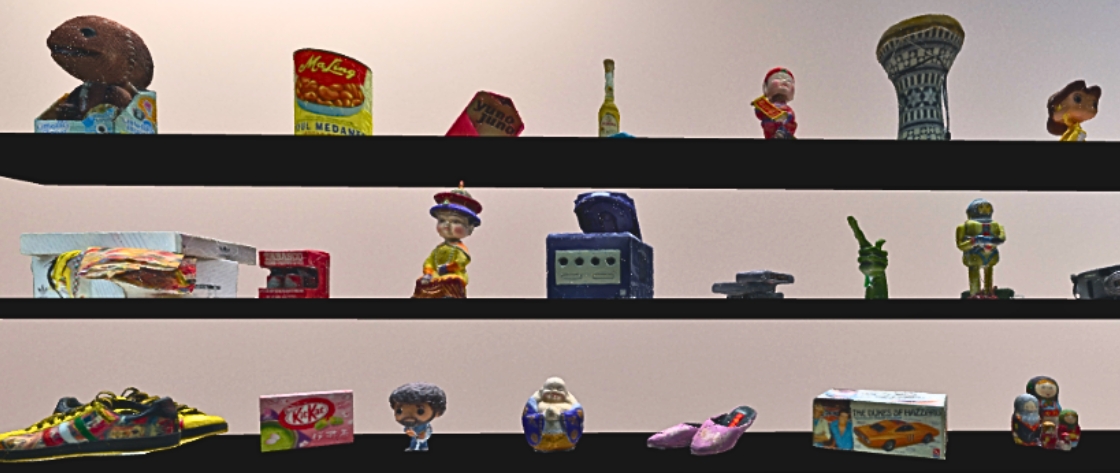
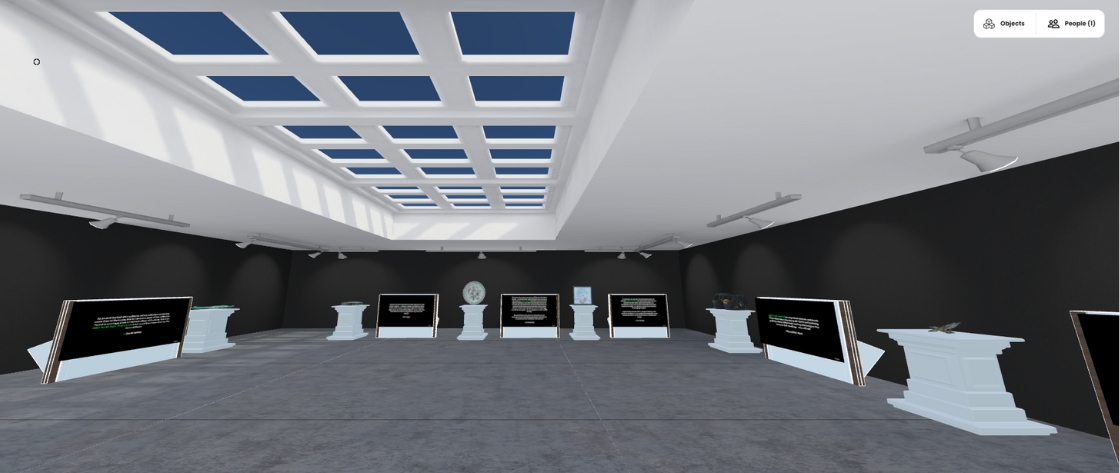
We also created a number of different rooms for a more engaging experience - if you navigate to the images on the shelves you’ll be able to enter 3 further rooms where you can see each of the ‘curious objects’ up close and read the personal story attached to each item.
To do this we needed to use the higher quality renders of each object which we were able to do in our smaller museum rooms as there were only 6 objects in each room vs. the larger number of objects in the main room on the black shelves which meant we avoided the upload errors.
The outcome: what did we learn
The real learning comes from feedback as to how it works as a space and how successfully it communicates our culture.
As a first prototype and testbed project we’re pretty happy with the results. Going back to one of our earlier blogs, the performance does very much depend on your own wifi speed as it can feel a little ‘clunky’ when you enter rooms and move around but, as we said, this is just one of the areas that will need developing if the metaverse of the future is to become part of our everyday lives.
Here’s a summary of our our key learnings:
Choose the right platform
It’s really important to pick the right platform for your needs and your users needs. Different platforms facilitate different things and they all have their own pros and cons. Unless you’re going to build your own metaverse from the ground up, once you’re on a platform, it’s their rules, be that levels of customisation or in our case, file size!
Discoverability
Some platforms allow for random people looking for something to do to access your space while browsing their metaverse. Others have more siloed experiences, We’ve got a link on our website but users aren’t going to stumble upon us after visiting our neighbour.
User devices
It’s worth considering the devices that your users will be using, a desktop connected VR headset is much more powerful than a phone in google cardboard so might give you more leeway with load times, quality and assets and even level of interactivity. But most people don’t have one of them so something that’s more accessible to the majority of users might be a better choice.
User navigation
Also It’s important to consider that these new places present new challenges to users that they’ need to be educated on. For example, controlling your avatar, how will they move around? What support do you need to give users who aren’t familiar with video game 1st or 3rd person style movement?
User experience
How do they interact with your space, what can they do, what can’t they do?
Moderation
Depending on the platform there may be pre-existing levels of system moderation, but encourage all users to respect your metaverse space as it probably won’t be practical for you to have a constant presence.
In summary...
So… I think we’ve proved that there is nothing stopping you jumping straight in and creating your own brand presence in the metaverse right now.. Go for it!
